Tuesday, February 4, 2014

Sloppy Joes

I think everyone knows what a sloppy  joe looks like, so I didn't take pictures......sloppy joes are usually one of the quick and easy meals to make on a weeknight...but the canned sloppy joe sauce is so icky, I made my own recipe up and my family loves it. It's super easy and made with stuff you probably have in your refrigerator/cabinets all the time.

Sloppy Joes

1 lb ground beef
1/2 cup ketchup
1 tbsp mustard
1 tbsp brown sugar
1 tsp dried onion
1 tsp worcesterchire sauce

Brown ground beef and drain the fat.  To the meat, add the remaining ingredients.......DONE!
And waaaaaaay better than the crap you buy in a can...:)

Carnitas

Traditionally, carnitas are made a lot differently than this, but I love how this turned out......I used a really big pork shoulder (pork butt), but you can use any size you like...just don't leave it on the grill as long....it should shred easily when fully cooked.....

Carnitas
7 lb pork shoulder/butt (I use bone-in because it adds more flavor to the meat)
1/2 onion, sliced
4 jalapenos, with core and seeds taken out
6 cloves of garlic
1/4 cup salt
1 tbsp pepper


Rub pork with salt and pepper...both sides......
On a piece of heavy duty foil, lay half the onion, garlic and jalapenos....then put the pork on top....add the remaining onions, garlic and jalapenos. Wrap tightly in the foil...I actually used two pieces of foil to ensure that the juices stayed inside.
I turned on the right and left burners of my gas grill and put the pork in the middle on indirect heat. The temperature in the bbq was between 350 and 375 degrees for 4 hours. I've always made these on the grill, but I'm sure you could use your oven if you wanted to.
I took the pork out and placed it directly on the grill to finish it off before I shredded it.

I also shredded the jalapeno and onion into the meat....sooo good!
Before you serve, put 1 tbsp salt into a cup of hot water...let it dissolve and sprinkle on top of the shredded meat....just be sure to taste it as you sprinkle so you don't add too much salt.
Serve with corn tortillas, lime, cilantro, onions, avocados...and whatever other toppings you'd like....

This picture really doesn't do this dish justice.  You have to try it to believe how yummy it is!


Friday, November 15, 2013

Parmesan Crusted Chicken with a Kick

I made this tonight and it came out so yummy, I decided to post it. I wanted to use bread crumbs, but didn't have any gluten free bread crumbs so I made my own by toasting two pieces of gluten free millet/chia bread and grinding them into crumbs.  You can do either. They sell gluten free panko bread crumbs, which I think would've worked really well with the moisture of the parmesan cheese.  So, if you aren't able to buy gluten free panko bread crumbs, just make them yourself!

Parmesan Crusted Chicken with a Kick

4 Boneless, skinless chicken breasts
1 cup gluten free bread crumbs (or homemade by toasting two pieces of gluten free bread and then putting them in a food processor to make crumbs)
1 cup Parmesan/Romano cheese (not shredded or shaved) I used grated.
1/2 tsp salt
1 tsp pepper
1/2-1 tsp cayenne (depending on how hot you want it. I used 1 tsp and it was YUMMY!)
2 tbsp mayonnaise


Mix bread crumbs, parm cheese, salt, pepper and cayenne in a mixing bowl.
Rinse Chicken breasts and pat dry with a paper towel.
I laid the chicken breasts in a 9x13 baking dish. One at a time, I spread a thin layer of mayo onto one side of the breast, then coated both sides with the parmesan/bread crumb mixture.Lay the breast mayo side up. Finish coating all the breasts and put into the baking dish.  I sprinkled the remaining bread crumb mixture onto the breasts in the pan and patted it down....just because..lol
Bake at 450 degrees for 20 minutes (or until juices run clear).  I found 20 minutes was perfect.  I let it sit about 5-7 minutes before serving.


Monday, November 11, 2013

Gluten Free Bacon Wrapped Meatloaf with Ketchup/Brown Sugar Glaze

I have seen a few posts of meatloaf "cupcakes"with mashed potatoes as the "frosting", so I decided to see if I could make a meatloaf that wasn't dry and had to be smothered in gravy or ketchup.  I think this meatloaf came out completely delicious and I was bummed I didn't put more of the glaze on it.


Gluten Free Bacon Wrapped Meatloaf with Ketchup/Brown Sugar Glaze

Meatloaf:
2 lbs ground beef
1 lb pork sausage (I used Jimmy Dean Regular Sausage)
1/2 white onion diced
6 garlic cloves, diced
1 carrot, shredded
1 stalk celery, finely diced
6 pieces  gluten free bread
1 cup milk
4 eggs, beaten
1 tsp thyme
1/2 tsp dry mustard
1 tsp salt
1 1/2 tsp Season Salt (Lawry's")
1/4 cup parmesan cheese
2 tbsp worcestershire sauce
6 strips of bacon


Glaze:
1/2 cup ketchup
4 tsp apple cider vinegar
5 tbsp brown sugar
1/2 tsp dry mustard
a couple dashes of hot sauce (I used tapatio, but you could use any hot sauce)
a few dashes of worcestershire sauce
1 pinch ground cumin

 In a shallow dish, lay the bread in a single layer.  Pour the milk over the bread and let it soak at least 5 minutes.
Mix dry ingredients and set aside. To the meat, add the eggs. Take the bread out of the milk and squeeze most of the excess milk out of it and break it into the meat mixture.  Add the remaining ingredients and mix until everything is evenly distributed.  

Form into a loaf on a baking pan or put into a loaf pan. Lay the bacon strips across the top of the meatloaf and tuck into the sides of the loaf pan or under the loaf if you made it on a baking pan. Bake at 350 degrees for 1 hour 10 minutes. Or until the internal temperature is 150 degrees.  If you are putting them into a muffin pan, they only need to bake for about 35 minutes.  The glaze can be put on half way through the cooking process.
If you're making the "cupcakes", just make mashed potatoes and add to the top of the meatloaf cupcakes.  I sprinkled cheese, bacon and green onions on top.  Delicious!


To make the glaze, just mix the ingredients together and pour over meatloaf half way through cooking time. 


Enjoy!!

Gluten Free Bolognese Lasagna with Bechamel

It took me a few tries to perfect this recipe, but I finally feel like it's post worthy.  The sauce is the key to this lasagna. I suggest letting it simmer all day.  The longer the better.  I made mine the night before and it rocked the next day in the lasagna.  If your sauce is already made, the lasagna is really pretty easy to assemble. The sauce is the most time consuming part. This recipe makes a lot of sauce, so you can freeze the leftover or use it in another pasta dish.


Gluten Free Bolognese Lasagna with Bechamel
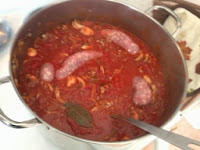
Deliciousness happening :)

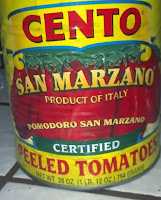
These are the best tomatoes to use!!!


For Sauce:
5 cans San Marzano Tomatoes
1 large white onion, diced
4 carrots, diced
4 stalks celery, diced
6-8 cloves garlic, diced
2 cups sliced mushrooms
30-35 Fresh Basil leaves (I just tear them and put them in the sauce)
4 Bay Leaves
1 1/2 cups Red Wine
2 tbsp salt
2 lbs ground beef
1 lb ground pork
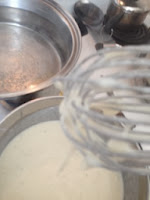
Bechamel
4 sweet italian sausage links
2 tbsp Olive Oil

For Bechamel:
5 tbsp butter
5-6 tbsp gluten free flour
5 cups warm milk
2 tsps salt
1 tsp pepper
1 tsp nutmeg

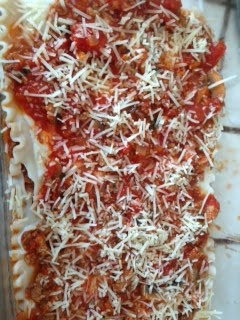
Gluten Free Lasagna Noodles
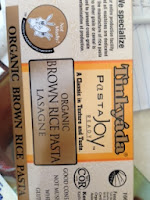
These noodles are the best to use! I don't know why this pic is sideways, sorry.

Shaved or shredded Parmesan/Romano Cheese 

In a large saucepan on medium high heat, add olive oil.  Add onions, carrots, garlic and celery. Saute about 5 minutes.  Add the beef and pork and cook through.  Once the meat is cooked, add the mushrooms.
Add the tomatoes. They are whole, so I use my hands to squish them into the pan.  It's the best way to do it.  If you don't want to do that, you can put them in whole and break them up as they cook.  Add the basil leaves, bay leaves, salt and wine.  

Bring sauce up just to boiling, then reduce heat to a low simmer. Add the sausage links whole into the sauce.  Simmer uncovered for at least two hours. The time really does make a huge difference in the end result.


To make the bechamel, put milk into the microwave for a few minutes until it's warm. Melt butter in a saucepan over medium high heat.  Add the flour and whisk to make a roux.  Cook for about a minute. Add warm milk and whisk continually. As it warms up, it will thicken. Be patient, the bechamel takes a few minutes to thicken, especially with the gluten free flour.  Add salt, pepper and nutmeg.
Cook lasagna noodles as directed and rinse with cold water.  
Start with a layer of sauce in a 9x13 baking dish.
  Add a layer of noodles. Spoon a layer of the bechamel, then sauce, then a generous amount of parmesan/romano cheese. Continue layering.
 
For the top layer, I just covered the noodles with sauce, then more cheese.
Bake at 350 degrees for 35-45 minutes.  Let the lasagna sit for at least 5 minutes before serving. 


Enjoy!!! 

Thursday, September 5, 2013

Chicken with Creamy Mushroom Sauce (Gluten Free)

This is my "go to" recipe when I don't have a lot of time or when I haven't been grocery shopping in a while and the cabinets are looking sad...lol....I It's super easy and always a hit with the fam!

Chicken with Creamy Mushroom Sauce

2 chicken breasts (cut into strips)
1 tbsp oil (I actually used bacon grease, which makes it yummier!)
1/4 cup diced white onion
2 cloves of garlic, chopped

1 can Progresso Cream of Mushroom Soup (GF)
1 tsp Bells Seasoning
1 tsp Pappys Garlic Herb Seasoning
1 tsp onion powder
1 tsp Herbs de Provence
1 tsp cornstarch

Saute the garlic and onion in a hot skillet with the oil or bacon grease.  Saute until onions are translucent. Add chicken and cook until almost completely cooked through. Add mushroom soup and all the seasonings, except the cornstarch. Simmer for about 5 minutes.
In a separate bowl, put 1/4 cup of water and the cornstarch and stir until the cornstarch is completely dissolved. Add to the cream of mushroom/chicken mixture and continue simmering another few minutes. 

Serve over gluten free pasta! It's delicious! You could also serve over rice......I've done that too and it's also really yummy!
This picture doesn't do the dish justice......

P.S. If you are not gluten free, you can use Cambell's Cream of mushroom soup diluted with some water and omit the cornstarch. 

Sunday, July 21, 2013

Shrimp Tacos

I was going to post the recipe for my fish tacos, but the day after I made those, we made these....and these ROCKED! You could actually put any type of fish inside these tacos....with the slaw and the sauce, of course!  I'm making them today, so I will update if I find a way to make them even yummier!

Shrimp Tacos
 For the Shrimp:

3 lbs fresh shrimp, de-veined (and de-pooped..lol)
1 cube butter
Juice from half of one lemon
4 cloves of garlic, minced

(I added about  1/2 tsp chipotle chili powder the last time I made these and I was NOT disappointed! This is totally optional, of course, but I suggest you give it a try!)


Slaw:

1pkg Cole Slaw
Juice of 2 limes
1/2 cup chopped cilantro
1/3 red onion, grated
1 tsp salt
1/2 tsp black pepper
1 tbsp olive oil

Combine all ingredients and mix well.


Sauce:

2 cups plain yogurt
1 1/2 tsp cayenne
Juice of 2 limes
1/4 cup cilantro
1 clove garlic
salt to taste

 Put ingredients into a food processor or blender and blend until smooth.
  Make sauce and slaw, chill in the refrigerator until ready to serve.
Melt butter, add garlic, lemon juice and parsley. Dip shrimp into the butter mixture before you put onto the grill. Grill on both sides until shrimp is fully cooked. (I used a grill pan on the bbq, but you could also do this inside in a cast iron skillet)

Warm corn tortillas. Add shrimp, slaw and sauce.......enjoy!


P.S. I had left over shrimp, cole slaw and sauce the next day...going to Easter and decided to make an appetizer out of it. So, I fried some corn tortillas that I cut into squares....topped them with the slaw, then the shrimp, then the sauce......everyone loved them!
Photo: What do you do when you have shrimp, slaw and sauce leftover from shrimp tacos? You turn them into an appetizer!