Sunday, November 4, 2012

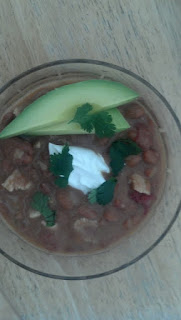
Albondigas (Mexican Meatball Soup)

Decided to make this soup for one of our friends because he said that growing up, this was his absolute favorite and he was having a problem getting the broth to taste just right.  I haven't actually had it before, so I didn't have much to go on.  I think I may have had it one time a long time ago, but anyway.....I didn't know what I was doing. Lol.  When this soup was done, I could NOT believe how amazing it tasted.  It has so many layers of flavor and just the right amount of spiciness. 
Albondigas (Mexican Meatball Soup)

For the Meatballs:
12 oz chorizo (the loose sausage that you can find by all the sausages in the grocery store)
1 lb ground beef
2 tbsp finely diced onion
2 eggs
1 1/2 Tbsp chopped cilantro
1/2 Tbsp chopped fresh mint
1/2cup panko bread crumbs
1 cup cooked white rice

For the Soup:
4 large carrots cut into bite sized pieces or 2 cups baby carrots
3 chayote (Mexican squash) peeled and cut into bite sized pieces
1.5 lb bag fingerling potatoes
3 stalks celery, sliced
2-49oz cans chicken broth (The Swanson giant cans)
3 cups beef broth
1 can diced tomatoes
1/2 white onion, diced finely
3 cloves garlic, minced
2 jalapeƱos , cut in half and seeded

This is what a chayote squash looks like.

Mix all the ingredients for the meatballs, but don't overmix or they will be tough.  Just make sure everything is equally distributed. Form into 1-inch meatballs. Bake for 15 minutes in a 400 degree oven. (The first time I made this, I dropped the raw meatballs into the soup and let them boil to cook. I've now realized that baking them helps them stay together better. You can do it whichever way you prefer.)
The Meatballs...yum!
In a largepot, add chicken broth, beef broth, chayote, carrots, potatoes and jalapeno. Bring to a simmer. Add the meatballs and continue to simmer for at least an hour. I let it cook for a few hours on low heat.  

Serve and enjoy!


Tuesday, October 9, 2012

Delicious Marinara Sauce

This sauce is so delicious on its own.....but could also be used as a base for any type of sauce you want....while we were eating dinner, we were all talking about what else it would be good on....we decided this weekend will be a chance to try it on some meatball sandwiches...maybe add some fresh basil....there are so many options with this sauce....I couldn't believe how delicious and easy it was! Please try it out and let me know what you think!

Delicious Marinara Sauce

2-28oz cans San Marzano tomatoes
1 white onion, peeled and quartered
1 stick butter
6 cloves of garlic
1 tablespoon italian seasoning
6 fresh basil leaves, chopped slightly
2 sprigs fresh rosemary


I opened the cans of tomatoes, squeezed them into the saucepan....just wanted them to be squished, not diced...... added the onion and the butter.......simmered for 30-45 minutes........I added the garlic, fresh herbs and italian seasonings after the sauce had simmered....and simmered another 10 minutes.  I used an immersion blender to puree the sauce.......that's it! So easy and so delicious!! I served it on corn spaghetti with freshly grated romano cheese....it was yummy!

Update:  The second time I made it, I didn't use the immersion blender...I left it chunky. I think I liked it like that even better. I served it with my mozzarella stuffed meatballs....we made meatball sandwiches! Topped with sliced provolone cheese.......absolutely delicious.


Wednesday, August 1, 2012

Gluten Free Brown Butter Pasta

This is a gluten free version of my Brown Butter Pasta.......I am Italian, so the idea of never having pasta again because I am now choosing to stick to a gluten free diet was devastating. I made this version and will never feel like I am missing my pasta again! I tried brown rice pasta, but I prefer the texture of the corn pasta much more. If you are trying to eat gluten free, this is a great way to get your pasta! :)


Gluten Free Brown Butter Pasta


1 pkg corn spaghetti (I found mine at Trader Joe's, but they have it at most large grocery stores)
1 cube (1/2 cup) butter
1 cup Parmesan/Romano cheese(or more...you can't have too much cheese, in my opinion)
4 cloves garlic, minced
1 Tbsp oil
1 Tbsp salt
salt and pepper to taste
a couple tablespoons chopped basil(about 6 leaves)
cherry tomatoes (halved, optional)

Bring water to a boil. Add 1 tbsp salt, oil and garlic to the water. Add pasta and boil 8 minutes.
While pasta is cooking, put butter into a small saucepan over medium heat.  The solids will separate from the oil in the butter. (At this point, the oil is clarified butter, but you want to keep going). Continue to heat, watching until all the solids have separated and the oil turns carmel in color.
 Remove from heat until all solids sink to the bottom of the saucepan.  You can try to pour out only the oil (the browned butter) or you can use a coffee filter to separate the solids from the oil (that's what I did and it was much easier).
Drain pasta and rinse with hot water for about 10 seconds. Transfer back into the warm pan that you boiled it in.
Pour browned butter over the pasta and toss until pasta is completely coated.  Add cheese, basil, salt and pepper.
Transfer to a serving dish and serve immediately.


Thursday, June 21, 2012

My "Haole" Paniolo Breakfast

When I lived in Hawaii, one of my favorite breakfast dishes was at McDonalds....I know, Mc Donalds...lol....but it was delicious! It was called the "Paniolo Breakfast"....Portuguese sausage, eggs and rice....you could also get Spam with it if you wanted, which I never did...because I'm not really sure how I feel about Spam...lol....So, when I moved back, I began to make my "Haole" version...(for those of you who don't know, haole is a word used to describe "non-Hawaiians")..... with Turkey Sausage instead of Portuguese sausage...My family loves it and every time I serve it to friends, they are always pleasantly surprised! It's quick and easy! We make it for dinner a lot, also because the kids LOVE it!

My "Haole" Paniolo Breakfast

8 eggs, beaten
4 cups cooked rice (2 cups dry rice/4 cups water)
1 Link gluten free turkey sausage
Tamari to taste.....we have also used Bragg's Liquid Amino Acids, but prefer the Tamari.....I used to use soy sauce, but because soy sauce is not gluten free, I had to change it up.


Put 2 cups of rice into the rice cooker with 4 cups water. Or cook rice in a saucepan as directed.

Cut turkey sausage into small pieces and saute until warm.
 Add beaten eggs and cook like you would cook scrambled eggs.

When egg and sausage mixture is completely cooked, add rice into the saucepan.  Mix all ingredients and add tamari to taste.

                                                This is the Tamari I used....

Wednesday, May 30, 2012

Brown Butter Romano Pasta

I had Spaghetti Factory's Mizithra Pasta last year for the first time. It was so incredibly delicious. I wanted to make it, but because Mizithra cheese is hard to find, I decided to make it with parmesan/romano cheese.  The result was not disappointing! It is the browned butter that gives it the nutty flavor and the parmesan/romano is a great choice! I have now made it with both cheeses and prefer the Parmesan/Romano to the Mizithra. I think everyone needs to try this recipe to really understand what I mean when I say that this pasta kicks some serious @$$!

Brown Butter Romano Pasta

1 pkg spaghetti noodles
1 cube (1/2 cup) butter
1/2 cup Parmesan/Romano cheese(or more...you can't have too much cheese, in my opinion)
4 cloves garlic, minced
1 Tbsp oil
1 Tbsp salt
salt and pepper to taste
a couple tablespoons chopped basil
cherry tomatoes (halved, optional)

Bring water to a boil. Add 1 tbsp salt, oil and garlic to the water. Add pasta and boil until pasta is cooked al dente...(about 10 minutes)
While pasta is cooking, put butter into a small saucepan over medium heat.  The solids will separate from the oil in the butter. (At this point, the oil is clarified butter, but you want to keep going). Continue to heat, watching until all the solids have separated and the oil turns carmel in color.
 Remove from heat until all solids sink to the bottom of the saucepan.  You can try to pour out only the oil (the browned butter) or you can use a coffee filter to separate the solids from the oil (that's what I did and it was much easier).
Drain pasta and transfer back into the warm pan that you boiled it in.
Pour browned butter over the pasta and toss until pasta is completely coated.  Add cheese, salt and pepper.
Transfer to a serving dish and serve immediately.
Garnish with chopped basil and tomatoes if you prefer.


I hope you all try this and tell me what you think!  Happy Cooking! :)


Sunday, April 22, 2012

The "Famous" Beans (Gluten Free!)

These are my "famous" beans....if you've ever come to my house for our carne asada nights, you've had these beans. They are super easy to make and always a big hit. They also freeze really well. This makes a big batch, so there's always leftovers and they taste even better the next day. I love refried beans, too, but these are the beans I usually make to go with Carnitas and Carne Asada.....they are delicious by themselves with some sour cream...mmmmm....or in a burrito...really, I've seen my friends eat them in some very creative ways...lol

The "Famous" Beans

1 white onion, diced
6 cloves of garlic, minced
1 pound bacon, cut into small pieces
2-14.5 oz cans diced tomatoes
1 giant can pinto beans (108 oz. Teasdale Brand is my favorite, but you can use any canned pinto beans) If you can't find the giant can, get 6-16oz cans of beans)
1-4oz can diced green chiles (HOT)
1 tsp black pepper
2 tsp salt
1 tbsp garlic powder

Saute onion and garlic about 5 minutes. Add bacon and saute until completely cooked.
Add remaining ingredients. Let simmer at least 30 minutes, but the longer, the better.  Yesterday, I made these and I brought it to a light simmer for the first 30 minutes, then I turned it on low until we were ready to serve, which was about 5 hours....they just get better!


Wednesday, April 18, 2012

Gluten Free AuGratin Potatoes with Ham

I made these for our family Easter get together. I didn't want to make plain ol' scalloped potatoes, so I decided to try a different cheese combination and also added ham and green onions. I think they came out super duper delicious!

Gluten Free AuGratin Potatoes with Ham

10 medium russet potatoes sliced thin...(I used a mandolin to make sure they were all the same thickness)
2 1/2 cups extra sharp cheddar cheese, grated
1 1/2 cup Gruyere cheese, grated
1/2 cup diced green onions
1 cup diced ham
1 stick butter
8 Tbsp gluten free flour
3 cups milk


Peel and slice the potatoes. Set aside.
In a large saucepan, melt butter. Add gf flour and mix with a whisk to make a roux. Cook until it's light brown, about 3-4 minutes. Don't burn it! Add the milk and stir with whisk until the mixture thickens. 2 cups cheddar and 1 cup gruyere cheese to the milk mixture.  This will be your cheese sauce.
Put one layer of the potatoes into a large baking dish. Add a little of the remaining cheese, some of the ham and some green onions. Add another layer of potatoes and to that layer, add some more cheese, ham and onions. Keep layering until you run out of room...it depends on the size of your dish. I used a large casserole dish and made 3 layers, but it took 2 hours to cook.
  If you use a 9x13 baking dish, you will probably only be able to make 2 layers. Just divide it equally.  You can also forget about the layering and add all the cheese, onions and ham to the milk mixture and just pour it over the entire dish. It's totally up to you. It all ends up mixed together anyway....
Bake at 375 degrees for about an hour and a half. I covered it for the first hour, then let it cook without the cover the remainder of the time. 
These are definitely not low fat, but totally worth the calories!!! And the hardest part is slicing the potatoes, so if you can invest in a mandolin, which can be as cheap as $20, it will save your sanity...lol.

Sunday, March 25, 2012

Manhattan Clam Chowder

 Clam chowder is one of my favorite soups! I love the Manhattan clam chowder because it's lighter and so flavorful.

Manhattan Clam Chowder (Gluten free!)

8 slices bacon, cut into small pieces
1 white onion, diced
5 cloves garlic, chopped fine
1/2 cup diced carrot
1/2 cup bell pepper, diced
4 large red potatoes, diced
2-8oz cans diced tomatoes
2-8oz bottles of clam juice
3 cups water
1 tsp oregano
1/2 tsp thyme
1 tsp salt
1 tsp pepper
1/2 tsp crushed red pepper
4 cans chopped clams
1/2 cup white wine

Saute bacon until slightly crispy. Add onions, bell pepper, garlic, carrots until onions are translucent. Add clam juice and water. Bring to a simmer. Add remaining ingredients except for the clams and the wine. Simmer for 30 minutes. Add clams and white wine and simmer another 10 minutes.
Serve with warm french bread! Yummmmy!


Tuesday, March 20, 2012

Bacon Fried Rice


Bacon Fried Rice


2 cups medium grain white rice
4 cups water
1 lb bacon cut into small pieces and cooked thoroughly
6 eggs, beaten
1 cup green onions
1/2 cup frozen peas
1/3 cup soy sauce
1/8 tsp cayenne pepper
1/2 tsp black pepper

Take the peas out and thaw or put in microwave for 30-45 seconds. Cook the rice as directed. I use a rice cooker, it's way easier. While the rice is cooking, cook the bacon until crisp. Put it on a paper towel to drain the oil. Scramble the eggs in a nonstick pan. Cut the green onions (I use the whole onion, but some people prefer just the green part.)  Put about 1 tablespoon oil into a large saucepan.( I use the bacon grease from the pan I cooked the bacon in.)  Add the rice and "fry" on medium heat just for a couple minutes. Add the bacon, eggs, onions, peas, soy sauce, cayenne and black pepper and mix until everything is evenly distributed.
My kids love this fried rice and my youngest is super picky!

Monday, March 19, 2012

Juliane's Chili

Sunday was a cold, rainy day....my friend and I decided to have an impromptu "chili cook off"......luckily we made two completely different types of chili and they both rocked! This is my chili recipe......

Juliane's Chili

2 Bell peppers, diced
1 White onion, diced
8 Cloves garlic, chopped
1/2 cup parsley
1.5 lb ground beef
1.5 lb ground pork
1/3 cup chili powder
1 1/2 tsp black pepper
2 Tbsp salt
1 1/2 tsp cumin
2 beef bouillon cubes
2 Bay leaves
1 tsp oregano
1 tsp crushed red pepper
1 can beer
2 small cans tomato sauce
1-28 oz cans diced tomatoes
3-3.5 lbs pinto beans (canned)

Saute the bell pepper, onion, garlic and parsley in about 2 tbsp oil until the onions are transparent.
To that mixture, add the beef and the pork. When the meat is cooked thoroughly, add the chili powder, salt, pepper, cumin, oregano and crushed red pepper. Add the beer to the mixture. Then add the beans, the tomatoes, the beef bouillon cubes and bay leaves.
This chili can be simmered for an hour or all day....it really just gets better. It's also even more delicious the next day, if that's even possible! lol
I served it with cheddar cheese and sour cream....YUMMMMMMMMY!


Saturday, March 17, 2012

Gluten Free Mozzarella Stuffed Meatballs!

If you love meatballs and want to make a moist, delicious meatball that melts in your mouth, this recipe is for you! I was watching Unique Eats on the Cooking channel and they were talking about a restaurant that serves a meatball stuffed with ricotta cheese and herbs. I'm not a huge fan of ricotta cheese, although, I do use it in my lasagna. I thought mozzarella cheese sounded way yummier. This is what I came up with. I served them with my homemade marinara sauce......yummy!

Mozzarella Stuffed Meatballs

1 lb ground beef 
1/2 lb ground pork
1/4 c. finely diced onion
1/2 c. parmesan cheese
1/4 c. gluten free panko bread crumbs(then more to cover each meatball) I got them at Whole Foods.
2 Tbsp minced garlic
1 tsp yellow mustard
1 Tbsp worcestershire
1/2 tsp black pepper
1/4 c. milk or heavy cream
2 eggs
1 tsp fresh thyme
2 tsp Pappy's seasoning (if you don't have it, the meatballs will still be amazing without it)
10 Mozzarella balls (I used Mozzarella Fresca, marinated)


Combine the ground beef and pork. In a separate bowl, beat eggs. To the eggs, add remaining ingredients, except for the mozzarella balls, and gently mix using your hands. (It's messy, but, really, the only way to make sure all the ingredients are equally distributed in the meat.)

Take about 1/4 cup of the meat mixture and form a little "nest". Put one mozzarella ball into the "nest" and cover with a little more of the meatball mixture. Roll the meatball in more panko breadcrumbs and place on parchment paper in a baking dish.


Bake at 375 degrees for 30-35 minutes or until meatballs are cooked completely. The mozzarella will melt and spill out of the meatballs if you overcook them, so keep an eye on them.
 Delicious!!

Monday, March 12, 2012

Chicken Fajita Lettuce Wraps

These are delicious and healthy.....a little messy to eat...lol...but totally worth the drippies...You can serve these with flour tortillas if you'd rather or on a french bread roll brushed with butter and toasted on the grill. Don't be scared by the amount of garlic in the recipe. It is essential for the flavor of these fajitas!

Chicken Fajita Lettuce Wraps

2 chicken breasts, cut into small strips
8 cloves of garlic chopped fine
1/2 white onion (sliced into strips)
2 cups sliced mushrooms
1/3 green bell pepper (cut into strips)
1/3 red bell pepper (cut into strips)
1/3 yellow bell pepper (cut into strips)
(You can also just use a green bell pepper if you prefer. 1 large green bell pepper)
4 Tbsp white wine
2 Tbsp butter
2 tsp Pappy's seasoning (if you don't have Pappy's, you can use 1/2 tsp basil, 1/2 tsp tarragon, 1/2 tsp garlic powder and 1/2 tsp onion powder, salt and pepper)
Romaine Lettuce
1 avocado


Saute the onion, garlic and bell peppers until the bell peppers are cooked, but still a little firm. Remove from heat. Saute the mushrooms in the butter and wine until soft, but not totally smooshy. Remove from heat. Cook chicken in the same pan that the mushrooms were in....Add the Pappy's (or the other spice mixture) to the chicken as it cooks.  Add the veggies back into the sauce pan.


Serve on romaine lettuce leaves with sliced avocado.

This picture really doesn't do this dish justice.  It's really delicious, but drippy. Make sure you have plenty of napkins. lol.

Sunday, March 11, 2012

Spanish Rice

I never used to like spanish rice. It seemed way too bland and dry. I am now a huge fan of spanish rice, but only when I make it...lol... this is my version of spanish rice and it's pretty yummy!

Spanish Rice

2 cups white rice
1/2 white onion, diced
1-8oz can tomato sauce
3 cups chicken broth

In a large saucepan, saute the onion in a little oil. Add the rice and brown slightly. If your skillet is on medium heat, this takes about 5 minutes. To the rice, add the tomato sauce. Stir and wait about a minute or two before adding the chicken broth. When you add the chicken broth, bring the mixture to a simmer. Let it simmer for about 3-5 minutes uncovered.  Cover. Turn the burner down to low and set the timer for 20 minutes. DO NOT lift the lid during that time. When the timer goes off, stir the rice and serve! :)


Honky Enchiladas

Best enchiladas ever! These are my absolute favorite! When I first learned how to make these, I used Campbells Cream of Mushroom soup. I needed to make the enchiladas gluten free for some friends and they told me that Progresso had a gluten free soup, so I used it and I will continue to use it in the future because it had a much 'fresher' taste. In a pinch, I will still use the condensed soup, but I definitely recommend the Progresso soup for this recipe. If you want to use the Campbell's cream of mushroom, you want to use about 5 cans and thin it out a little with chicken stock, about 1-2 cups. These enchiladas are always a success!


Honky Enchiladas

4 chicken breasts cooked and shredded
2 lbs Pepper Jack cheese, shredded (you can use half regular jack cheese and half pepper jack if you prefer less spice)
1-7oz can of Diced green chiles (I use the mild because of the pepper jack, but you can get spicy if you want)
3-18 oz cans Progresso Cream of Mushroom soup
approximately 40 white corn tortillas

To cook the chicken, you can use a pressure cooker or boil them. The pressure cooker is my preference because the chicken comes out very tender and shreds easily. Cooking time is 8 minutes in the pressure cooker. I add 1 cup of water, 1/2 an onion and 3 cloves of garlic. (If I boil the chicken, I also add the onion and garlic to the water. Boil until cooked thoroughly.)

In order to  make the tortillas easier to work with and softer in the enchilada, each tortilla needs to be lightly fried. In a cast iron skillet or regular pan, add about 2 or 3 cups of vegetable oil. Heat the oil. When you put the tortilla in the hot oil, it will sink to the bottom initially, then float to the top. Once it floats to the top (about 5 seconds), flip it over and continue frying about 3 more seconds. You don't want to fry them until they're crisp. They just need to be lightly fried! Place on paper towels to drain the oil off. 

To assemble the enchilada, first add about 1/2 cup of the cream of mushroom soup on the bottom of a 9x13 baking dish. The tortillas are next and the first layer usually takes about 6. You want to have the bottom layer of tortillas go up the side of the dish a little.
Add a layer of chicken, scatter some green chiles, cheese and cream of mushroom soup.Then a layer of tortillas, then more chicken, green chiles, cheese and soup. I make 3 layers and then on the top, I put a layer of tortillas and top with more cheese. This recipe makes two whole pans of enchiladas.

Cook in a 350 degree oven for about 30 minutes until heated through.

Enjoy!


Sunday, March 4, 2012

Best Teriyaki Marinade

This marinade is so delicious and pretty easy to make. Definitely worth the effort. I will never used a bottle of store bought marinade again!

Best Teriyaki Marinade

1 cup soy sauce
1 cup water
1 cup brown sugar
1/4 cup toasted sesame seeds
1/2 cup green onions, cut into small pieces (you can also use white onions)
1/2 cup cilantro
1 tsp grated fresh ginger
1 tsp rice vinegar
1 tsp red pepper flakes
1 tsp oregano
4 cloves garlic, crushed or sliced

Combine the soy sauce and the brown sugar until the sugar dissolves. Add the remaining ingredients. Pour over meat and let marinate at least an hour, but the longer the better!!

Sunday, February 26, 2012

Brie Appetizer with Caramelized Onions and Bacon

So, yesterday, I found a triangle of brie in my frige that needed to be used.....I hadn't gone grocery shopping and didn't have a whole lot in the house. I did have an onion, so I sliced the onion and started caramelizing the onions with a little olive oil and coconut oil.  I was contemplating adding cranberries or honey, but the idea of a sweet brie didn't really sound good to me....so I kept looking. As the onions were caramelizing, I went and cut 5 sprigs of fresh rosemary off the plant outside and cut it up really small. I added it to the onions and they smelled YUMMY! I was still thinking of what I could add when I found bacon...hmmm......

Brie Appetizer with Bacon and Caramelized Onions

1 triangle of Brie (I didn't save the package, so I don't know the ounces. It was the 
brie you can find at any grocery store. Not the whole wheel, just the triangle....I don't know how else to describe it...lol)
1 white onion (caramelize with 1/2 Tbsp olive oil....like I said, I added coconut oil just to see how it would turn out and it turned out pretty yummy, but olive oil works fine too. You want to cook the onions slow and low until they are sweet.)
1/8 teaspoon fresh rosemary (cut up really fine)
6 strips of bacon cut up in 1/2 inch pieces

I caramelized the onions.....added the rosemary.....then when they were sweet, I removed them from the pan and cooked the bacon until crisp. After the bacon was fully cooked, I added the onions back into the pan. I put the brie into a small corningware dish and covered with the onion/bacon mixture. I baked at 350 degrees until the brie was melted. About 10 minutes. I served with whole grain club crackers. Seriously surprised myself with this one. I had no idea it was going to turn out so delicious, but it really did! 

.

Monday, February 20, 2012

Delicious Garlic Bread

So, I signed up to bring a "side dish" for a work staff meeting. The main dishes are lasagna and spaghetti, so I thought I'd make some garlic bread.  I didn't want to just make plain ol' garlic bread, so I made up a butter spread and tested it out on my fam...my husband approved :) So, here's the garlic bread recipe!

3 heads of roasted garlic
2 sticks of butter, softened
2 Tablespoons Parmesan cheese
1 tsp dried basil
1/2 tsp dried thyme
1/4 tsp fresh rosemary (finely chopped)
1 Tbsp fresh parsley (finely chopped)
1/2 Tbsp olive oil
1/4 tsp red pepper flakes
1 loaf of sweet french bread

To roast the garlic, I cut the tops of the heads of garlic. Drizzle with olive oil, sprinkle with salt and wrap in tinfoil. Bake at 385 degrees for about 25 minutes or until they're soft. (I don't usually time it. I just wait til the smell of roasted garlic fills the house.) When the garlic is cooled, squeeze the roasted garlic into a small bowl and smash it. Add the smashed garlic to the butter and add the remaining ingredients.
Cut the loaf of bread lengthwise and spread the butter mixture evenly. You can bake it if you prefer, but I like to broil it until it's crispy.
Finish by sprinkling it with fresh parsley. :)

I also thought about substituting cheddar cheese for parmesan cheese. I may try that next time!


Beer Can Chicken

This is my favorite way to cook a whole chicken. I always make soup the next day with whatever is left. If you don't want to use beer, you can roast it in the oven and just omit the beer.  It still comes out delicious.


If you are using beer, pour out (or drink) half of a can of beer. Using a can opener, take the whole top off of the beer can. Into the beer, add 2 sprigs of fresh rosemary, a clove of garlic (you can put it in whole or smash it), a little onion (just a few pieces), the top of one stalk of celery (the leafy part is the best because it has a lot of flavor) and a small piece of carrot. 

For the rub:

2 Tablespoons Pappy's Garlic Herb Seasoning (This is my absolute favorite seasoning! It's delicious on pretty much everything! I get it at Smart and Final in a ginormous container because I use it so much! If you don't have Pappy's, you can make a mixture of 1Tbsp garlic powder, 1 tsp salt, 1 tsp pepper, 2 tsps onion powder, 1 tsp dried basil and 1 tsp dried tarragon.)
1 Teaspoon Ground Sage


I also cut a lemon in half and put it under the skin on the breast of the chicken... to give the chicken boobies....lol...

After I put the beer can in the holder, I prop the chicken and put it into a roasting pan.

Into the pan, I add:

3 cups of chicken broth
1 whole onion, diced
3 large carrots, cut into coins
3 stalks of celery, diced
3 zucchini (large cuts so they can hold up to the cooking and don't get too mushy)
4 potatoes (cut into 2 inch chunks)
5 sprigs of fresh rosemary
1 whole head of garlic (I peel it and leave them whole. Great for smashing onto french bread during the meal. :) )

The chicken broth can be increased by one more cup if it looks like it's needed.  It kinda depends on the size of your pan. You don't want the veggies completely submerged in the broth, but about halfway is good. I sprinkle the veggies with salt and pepper or with more Pappy's.

If you are cooking it on the grill, the temperature should be about 350 degrees. I cook it for 15 minutes without foil, but then make a "tent" with tinfoil for the remaining cooking time.  Usually, it takes about an hour and 15 minutes to cook.  I use a thermometer to make sure the chicken's internal temperature is 180 degrees. I turn the grill off and let it rest for about 10 minutes before cutting it. I also cut the chicken up and place it into the pan with the veggies and chicken broth.

This is a great meal to make when you have people over because it's a one pan kinda meal.  We usually serve it with french bread.

Like I mentioned before, I always make soup out of whatever is left. I will have to post that recipe next. 
In this picture, there are fewer veggies than the recipe calls for....but it gives you an idea.....sorry if the "boobies" offend anyone.


Tuesday, February 7, 2012

Broccoli Cheddar Soup

There are so many variations to this soup. I have never made it exactly the same. This is the latest version of the recipe. lol. This recipe makes a nice, big pot of soup!

Broccoli Cheddar Soup
2-3 lbs Broccoli (Florets, preferably...)
4 Yukon gold potatoes (peeled and cut into cubes)
1 white onion
8 Cloves of garlic
6 Carrots (cut into 3 inch sections)
3 Quarts chicken broth
3 cups shredded sharp cheddar cheese
1 Tablespoon salt
1 Teaspoon pepper
1 Can cream of chicken soup- optional (I used this in one batch of the soup and it was delicious. Although, it's totally optional. The soup really has enough flavor on its own.)

Place broccoli, potatoes, onion, garlic and carrots into a large stock pot.  Cover with chicken broth. Simmer until the veggies are soft. Usually about 20 minutes, but just keep checking. You can't over-simmer them. 
Use an immersion blender to puree the veggies. You can also put them into a blender in batches to get the same consistency.
To this mixture, add salt, pepper and cream of chicken soup.
Once that is all mixed, add shredded cheese and stir.
Taste and add more salt & pepper to your liking.
You can garnish with cheese....or bacon bits....or sour cream...all delicious options!
And enjoy! :)
*Sometimes if I have zucchini or cauliflower, I add that in, too.
*If the soup is thinner than you'd like it to be....in a jar, add 1 tablespoon of flour to 1/3 cup of water and shake until blended.  Add this to the soup and simmer for a few more minutes.  The flour should help to thicken it up, but you want to be sure you simmer the soup with the flour in it for a little bit to make sure the taste of the flour isn't noticeable.


Sunday, February 5, 2012

Bloody Mary....delicious and spicy...too spicy for my cat....lol

Juju's Bloody Mary

3 cups V8 Juice
2 Tbsp Horseradish
1 Tsp pepper
2 Tbsp Worcestershire Sauce
1 Tsp celery salt
1 Tsp Tobasco
1/2 cup vodka

Mix all ingredients...add ice....enjoy :) 
You can garnish with a stalk of celery, olives...whatever you prefer :)

Friday, February 3, 2012

Homemade Buttermilk Pancakes

Super Sunday Breakfast wouldn't be the same without homemade Buttermilk pancakes. These are easy to make and way better than any packaged mix! This picture was taken on Valentine's day...I made my boys heart shaped pink pancakes for breakfast...:) Obviously, add red food coloring to the batter......and I use an empty bottle of syrup....pour the batter into it and that makes it easier to make the heart shapes....:)

Buttermilk Pancakes

2 eggs 
2 cups buttermilk
2 Tablespoons vegetable oil (I use coconut oil because it gives a yummy flavor)
2 Teaspoons Vanilla extract
1 Teaspoon Baking Soda
1 Teaspoon Salt
2 Tablespoons sugar
1 3/4  cups of flour


Beat two eggs. Add buttermilk, oil and vanilla extract. Add Baking soda, salt and sugar. Stir to blend. Not too much.  Add flour 1/2 cup at a time. Stir to incorporate ingredients, but don't overstir. You want some lumps! They make the pancakes even better! You can cut out some flour if you want thinner pancakes. Add the full amount for thicker pancakes. 
I use a measuring cup to pour 1/4 cup of batter onto the skillet per pancake. Cook until golden brown on both sides. 
Enjoy! :)


Thursday, February 2, 2012

BBQ Chicken with Brie and Carmelized Onions

This is a meal I had at a friend's bbq years and years ago......I tried to recreate it as best I could...and it came out delicious....


BBQ Chicken with Brie and Carmelized Onions

2 Red Onions, sliced thin
One wheel of Brie Cheese
4 Chicken breasts
Sweet Baby Rays Bbq Sauce (or whatever your favorite bbq sauce is)


Slice onions and place in skillet with a little olive oil (2Tbsp...ish)...cook slow...for 15-25 minutes.....until translucent and sweet to taste......
Bbq chicken with your preferred bbq sauce.....place on the grill until fully cooked....
Slice Brie. (I usually take the "skin" off of the brie, but some people don't mind it, so it's totally up to you)
When chicken is done, brush with a little more bbq sauce.....top with Brie...then the carmelized onions......


I apologize for my lack of recipe skills...I usually just cook without writing stuff or measuring, so this is hard for me.....this one is pretty easy though, so....try it! :)
And in this picture, I used white onions because it was all I had...still delicious, but I prefer red....and I will have to post the brussel sprout recipe soon.......This picture just doesn't do the chicken justice.....it tastes sooooooo much better than it looks....LOL.


Spicy Shredded Tri-Tip

If you are having people over, but don't have a lot of time to cook, this is a great choice! Always yummy and you can prepare it the night before and just turn the crock pot on in the morning! 


Spicy Shredded Tri-Tip

1 tri tip roast
1 white onion, diced
4 cloves of garlic, chopped
2 bay leaves
1 Tbsp white vinegar
1-16oz can of crushed tomatoes
1 small can tomato sauce
1 cup red wine (cabernet, sangria....whatever....lol)
1-8oz can of el pato spicy tomato sauce
salt and pepper to taste

In a crock pot, pour vinegar in, then add tri tip, fat side down. Add remaining ingredients.  Cook on high for 8 hours or low for 10 (I recommend low for 10). Remove bay leaves. The meat should shred easily with a fork.
Serve with warm flour or corn tortillas...you can also serve in tacos, tortas....or just eat it in a bowl with sour cream on top....it's delicious!!!!

The first time I had it, we had it on Sopas....with homemade refried beans, the tri tip, lettuce, tomatoes, onions, cilantro, avacado and homemade salsa.....absolutely delicious......


Asian Pasta Salad


 So, I don't make pasta salads a lot...I just don't..I don't know why...I guess I don't really like how some are super oily and lack flavor.  I wanted to bring one to a family get together, but I wanted it to be different. Not the typical pasta salad from the grocery store. I love Asian food....LOVE IT....and this recipe brings all the delicious flavors I love together.

Here's my Pasta Salad Recipe.....


 Asian Pasta Salad

16oz Bowtie Pasta (I used penne once, too...but prefer the bowtie)
1/3 cup sesame seeds
1/3 cup lite soy sauce(you can use regular, but it is a little salty..)
1/3 cup rice vinegar
2 tsp sesame oil
3 tbsp sugar
1/4 cup vegetable oil
1/2 tsp grated fresh ginger
1/4 tsp black pepper
3 cups shredded, cooked chicken breast (I pressure cook the chicken, but you can boil it or even take the chicken off a store bought rotisserie chicken)
1/2 cup chopped cilantro
1/2 cup chopped green onions
1/4 cup shredded carrots (optional)
2 Roma tomatoes, diced (optional)

Roast sesame seeds and set aside.
Cook pasta al dente (about 9 minutes)...rinse with cold water until it's completely cooled and drained.
In a container with a lid (I used a mason jar), mix soy sauce, rice vinegar, sesame oil, sugar, vegetable oil, ginger, pepper and sesame seeds. Shake until blended thoroughly.
Pour over pasta. Add chicken, cilantro and green onion.
Stir until equally distributed.


*I did add a couple more splashes of soy sauce and a little splash more sesame oil...I love that flavor.
* I also thought about adding some crushed red pepper for a little spice.
*You can add roma tomatoes if you'd like or any other vegetable you think would be good.